Current Article
How To Create a Lifetime Pass QR Code
How To Create a Lifetime Pass QR Code
Step-by-step instructions on generating a dynamic lifetime Pass QR Code.
Use a Pass QR Code to create a digital event pass with QR-based check-in. You can configure event details, staff check-in credentials, recipient delivery, and post-admission information.
Tip: Test the check-in flow with a phone camera before distributing passes to verify that the check-in password and entry fields work as expected.
Common uses:
- Event entry
- Attendee check-in
- Digital event passes
- Conference badges
- Member admissions
- Venue access control
Before You Create the QR Code
Have the following details ready before starting:
- Event Name: Title of your event (required, max 100 characters)
- Date, Time & Venue: Schedule and location information (optional)
- Check-in Password: Password for staff to authenticate entry (required)
- Check-in Mode: Whether the pass is single-use (Auto Check-in) or multi-session
- Recipient Details: Attendee name and email if sending passes automatically
- Post-Entry Details: Seat, gate, or zone details displayed after check-in
Protect Your Check-in Password
Share the Check-in Password only with staff managing entry. Do not share this password with attendees.
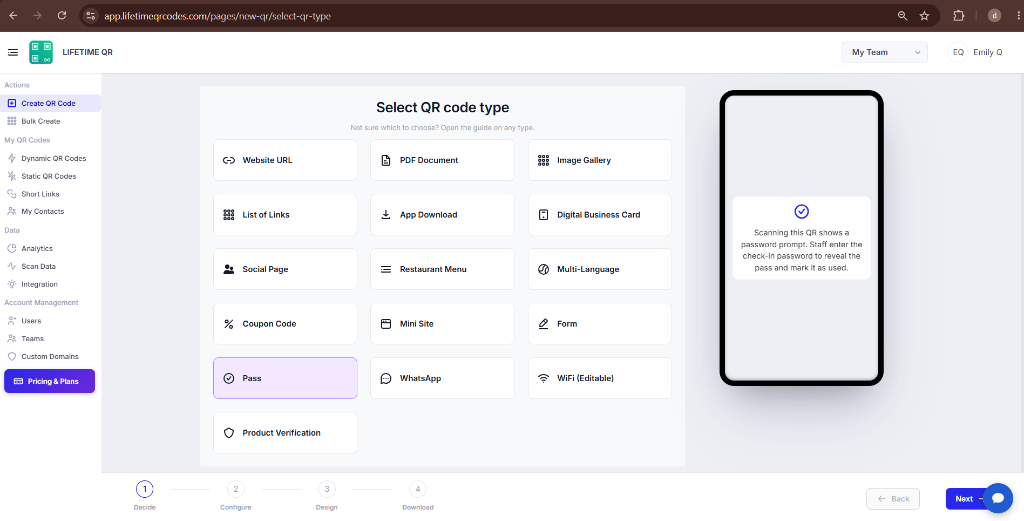
Step 1: Login & Select Pass (Decide Phase)
- Log in to your Lifetime QR Codes dashboard.
- Click Create QR Code in the header or sidebar.
- Select Pass from the QR code types list.
- Click Next to open the configuration form.
Step 2: Configure Pass Details (Configure Phase)
Configure your event information, check-in verification rules, recipient details, and post-entry fields:
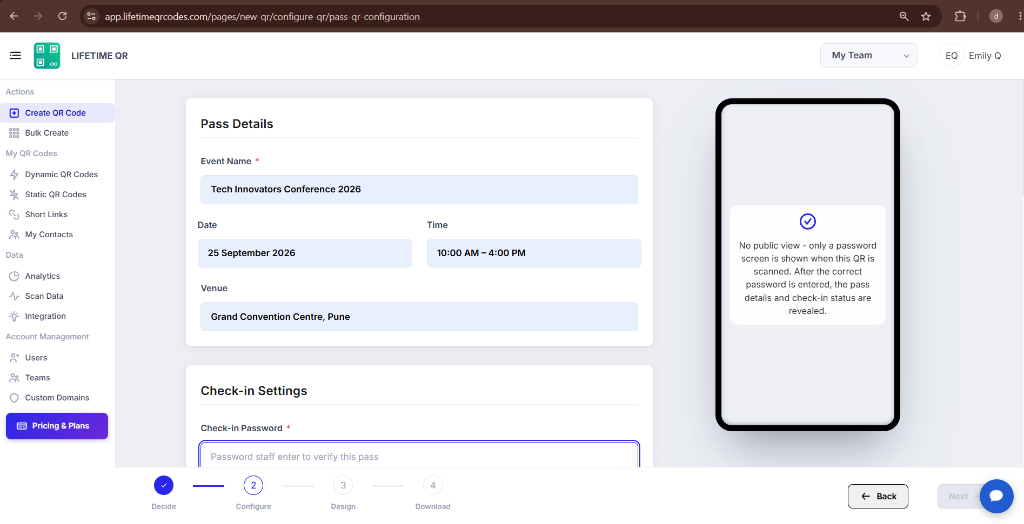
A) Pass Details
Enter the event title and schedule. The Event Name is displayed at the top of the pass.
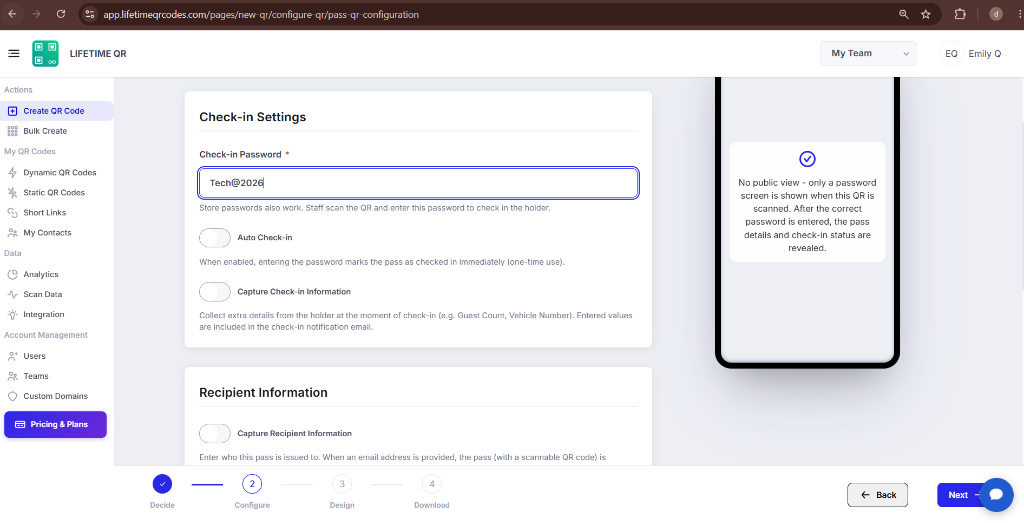
B) Check-in Settings
Set up the password staff use to verify passes upon scanning, and choose your check-in behavior:
Custom Check-in Fields
When Capture Check-in Information is toggled ON, click Add Field to add prompts for entry staff:
- Label: Name of the field to collect (e.g.
Guest CountorVehicle Number). - Required: Check to require staff to fill this field before confirming check-in.
- Delete: Click the trash icon to remove any field row.
C) Recipient Information
Assign the pass to an attendee. When an email address is entered, the pass and its scannable QR code are automatically emailed to the recipient.
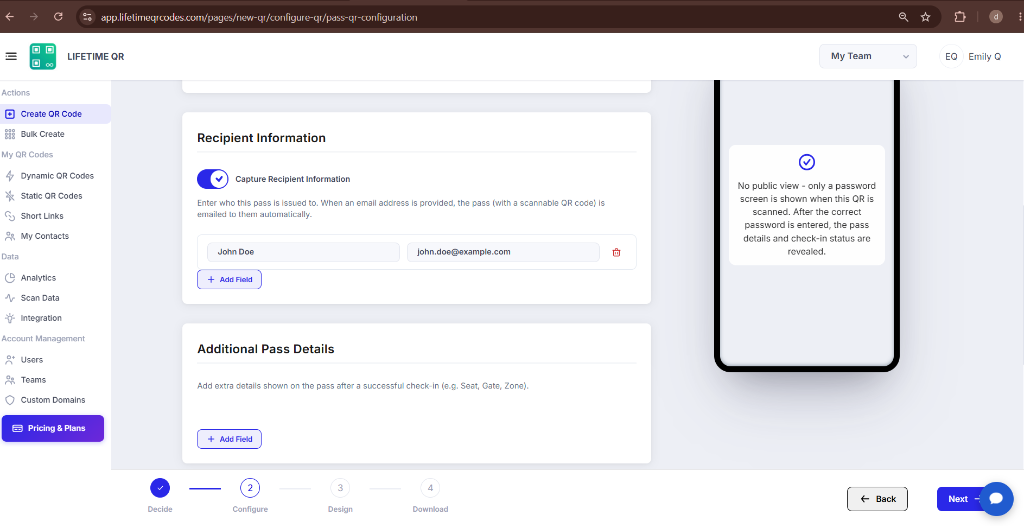
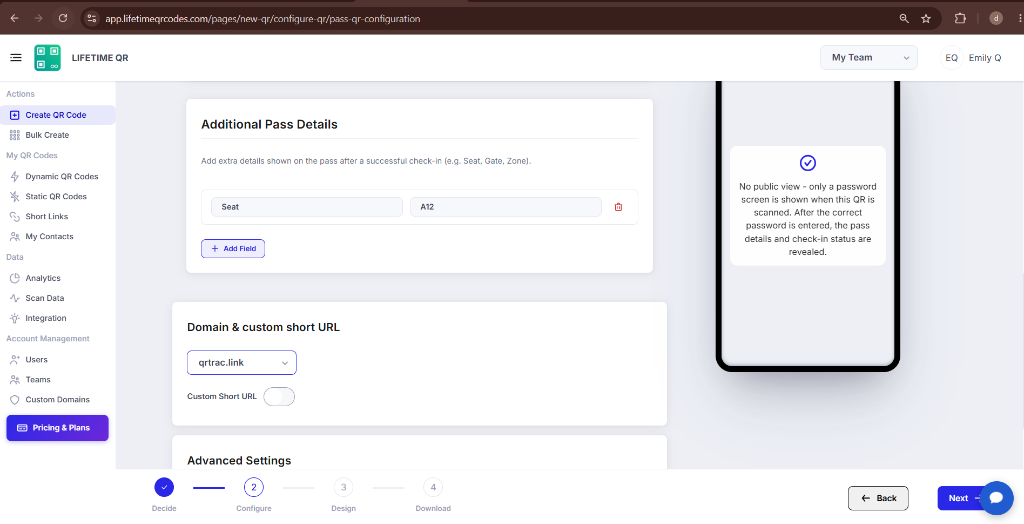
D) Additional Pass Details
Add extra details displayed on the attendee's pass screen after a successful check-in, such as gate or seating assignments.
Step 3: Design Your QR Code (Design Phase)
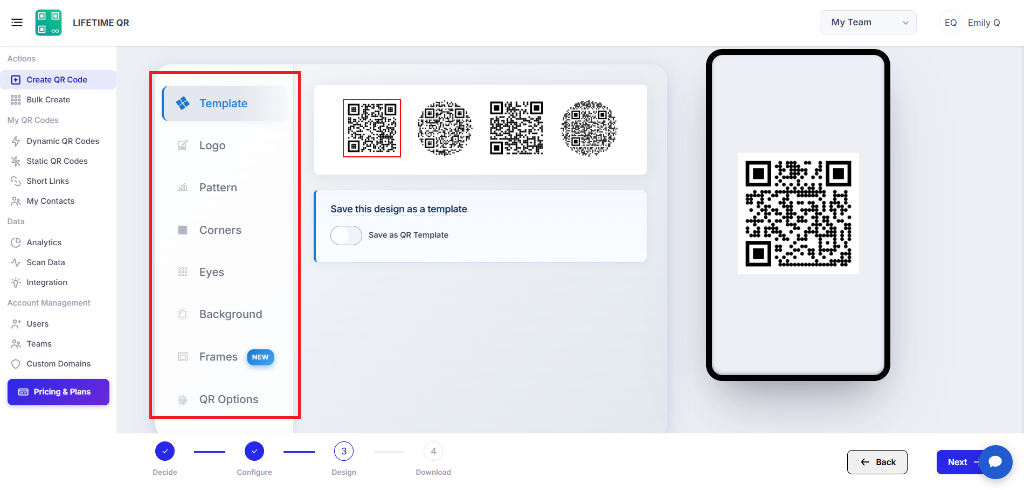
Click Next to customize the visual appearance of your QR code:
- Frames: Add a frame with call-to-action text (e.g. "SCAN FOR PASS" or "CHECK-IN HERE").
- Pattern & Shapes: Choose dot patterns, body modules, and corner eye designs.
- Colors: Set single colors or multi-color gradients for foreground and background.
- Logo: Upload an image or logo to center inside the QR code.
Step 4: Review & Download (Download Phase)
Review the pass details on the confirmation screen and check the live mobile preview before downloading.
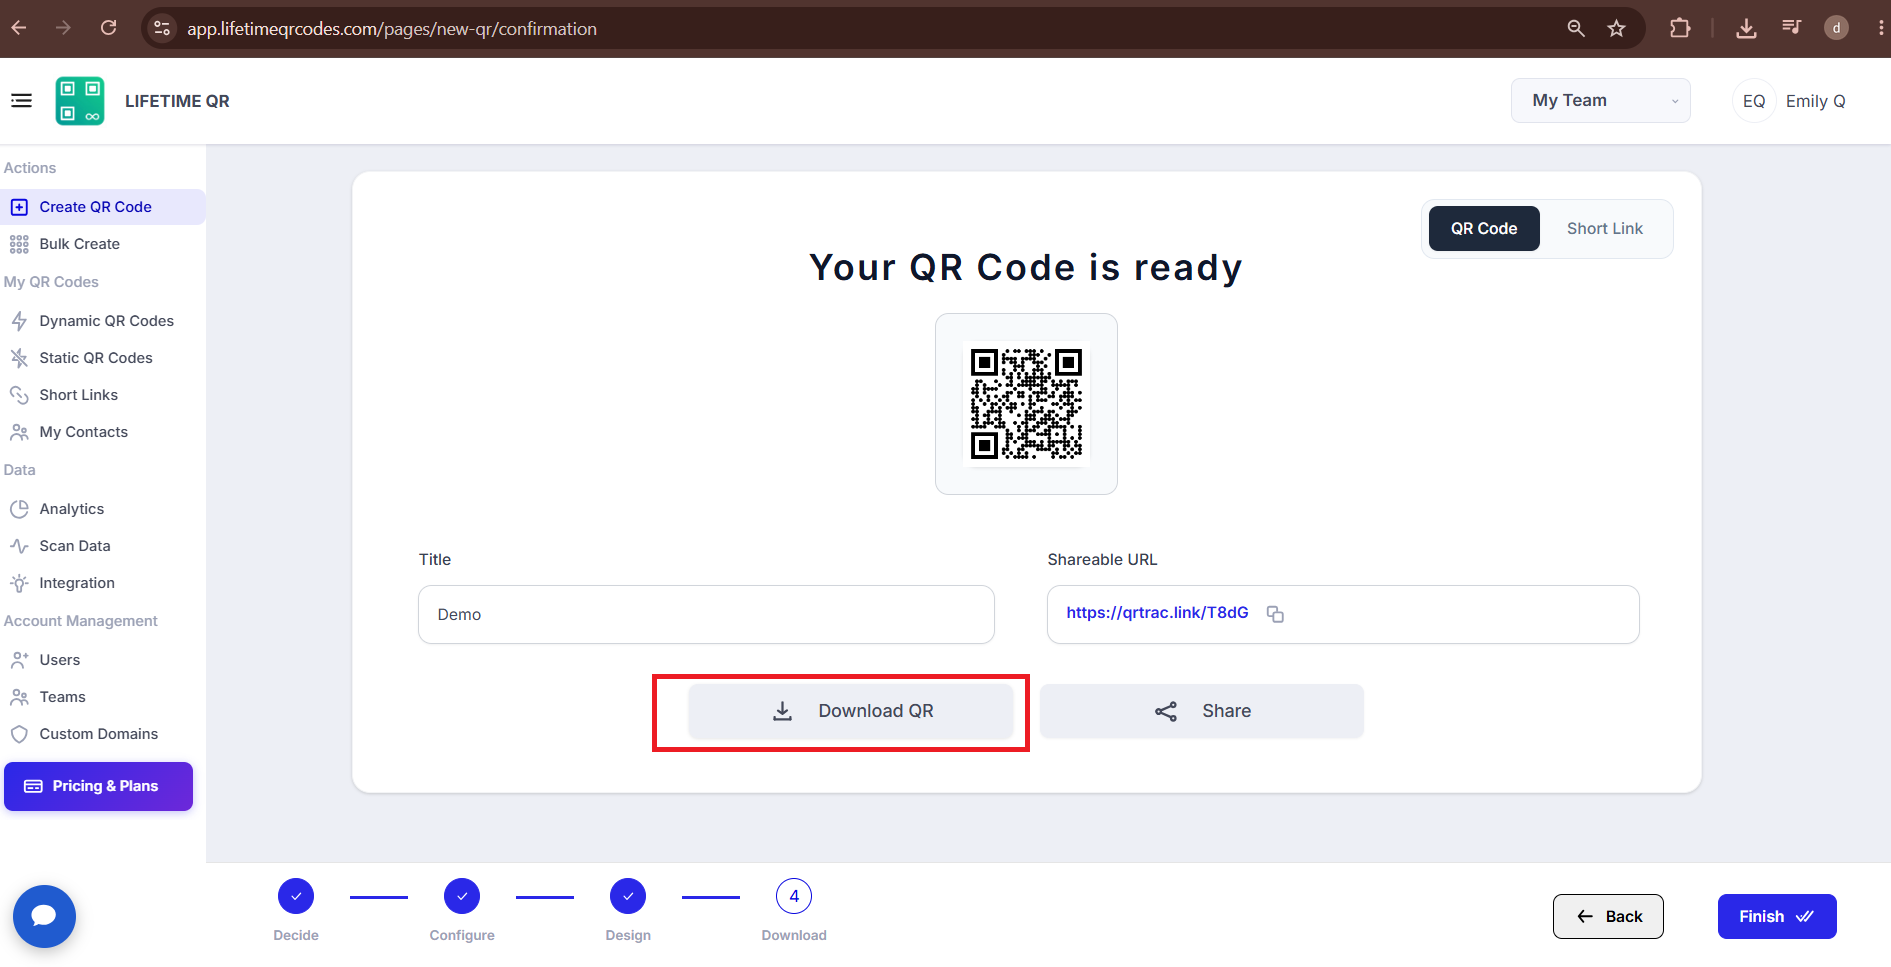
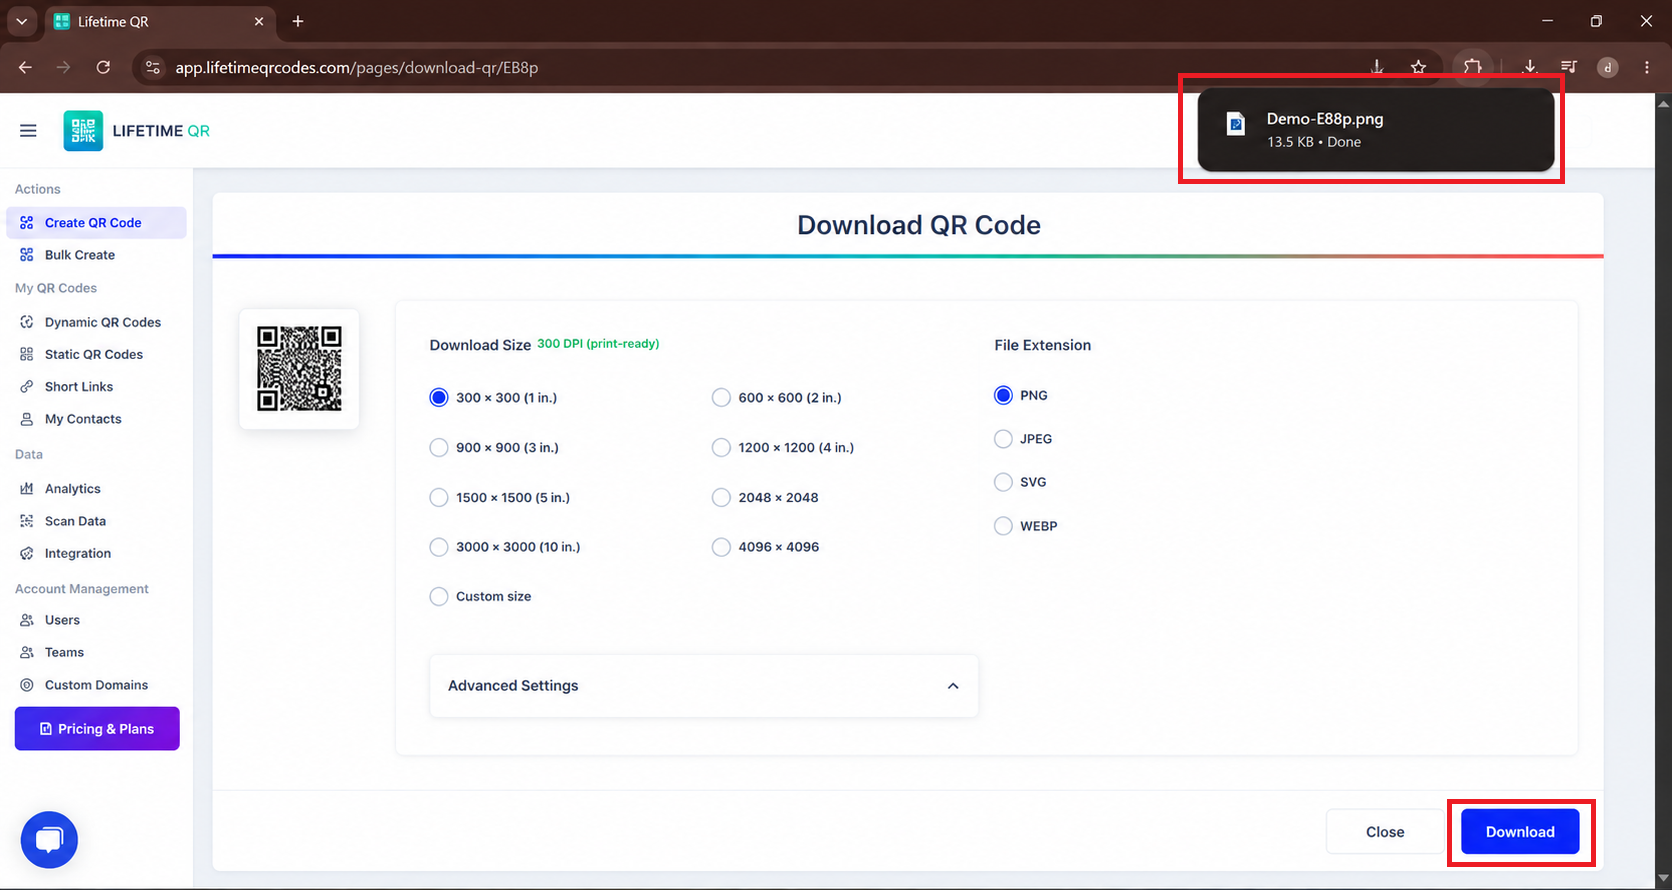
Click Download QR to export your QR code in your preferred format:
- PNG: Standard raster image for digital tickets, emails, and web pages.
- SVG: Vector format for responsive web layouts and digital displays.
- PDF: Print-ready document for event badges, tickets, and lanyards.
- EPS: Vector format for professional printing and signage.
Save as Template
Toggle Save as Template on the confirmation screen to save your design and settings for generating future passes.
Frequently Asked Questions
What is a Pass QR Code?
A Pass QR Code is a digital entry ticket for events and venues. When staff scan it, they enter a password to verify the holder and grant access.
How does check-in verification work with the staff password?
Staff scan the pass and enter the Check-in Password to verify it. Once verified, the pass is checked in and the entry is recorded.
Can passes be sent directly to attendees via email?
Yes. Enable "Capture Recipient Information" and enter the attendee's email to have the pass and scannable QR code sent automatically.
What happens when Auto Check-in is enabled?
Entering the check-in password immediately marks the pass as used. This ensures one-time entry and prevents pass reuse.
Can I collect extra details from attendees at the door?
Yes. Turn on "Capture Check-in Information" to add custom fields (like Guest Count or Vehicle Number) that staff complete upon entry.